How to use tinymce with angular 13 (2022)
TinyMCE the open source WYSIWYG editor of choice
The WYSIWYG editor known, and loved, by millions of developers worldwide. TinyMCE is built to fit seamlessly into your product or website. From workflow automation to email builders and more, TinyMCE is the professional development team editor of choice.
It can be integrated into many different frameworks, like tinymce for angular, tinymce with vue.js and many others.
Let's see how fast and easily we can start with the tinymce with angular integration.
Create a new angular application with the angular cli
ng new --defaults --skip-git tinymce-angular-demoInstall the tinymce angular package with npm
npm install --save @tinymce/tinymce-angularImport EditorModule in the app.module.ts in the Import section
   imports: [
     BrowserModule,
     EditorModule
   ],
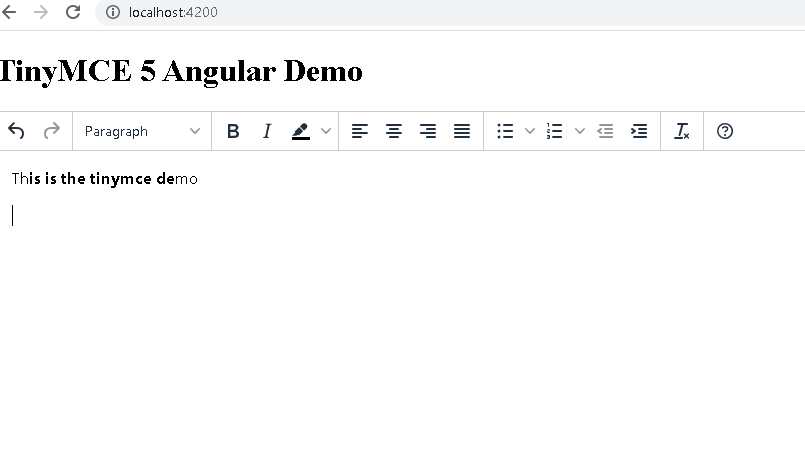
After this step, the tinymce editor is ready to use, just put the editor component into the app.component.html, and it's ready to go, the tinymce for angular integration is ready.
TinyMCE 5 Angular Demo
 <editor
   [init]="{
     height: 500,
     menubar: false,
     plugins: [
       'advlist autolink lists link image charmap print preview anchor',
       'searchreplace visualblocks code fullscreen',
       'insertdatetime media table paste code help wordcount'
     ],
     toolbar:
       'undo redo | formatselect | bold italic backcolor | \
       alignleft aligncenter alignright alignjustify | \
       bullist numlist outdent indent | removeformat | help'
   }"
 >
Just start it with an ng serve, and open the browser with localhost:4200

You can use the ready made source code form my github repo
Also you can check the tinymce .net core image uploader article here
Tinymce for react quick startup article can be found here