How to create an AI assisted translator application within 5 minutes with AWS Translate
AWS Translate is a cloud-based service that enables developers to translate text in more than 50 languages. The service offers translation for web and mobile applications, as well as content management systems.
It is very easy to use AWS Translate. All you need to do is upload your text and attach the language pairs you want to translate it into. The service will return the translated text back in the desired language of your choice.
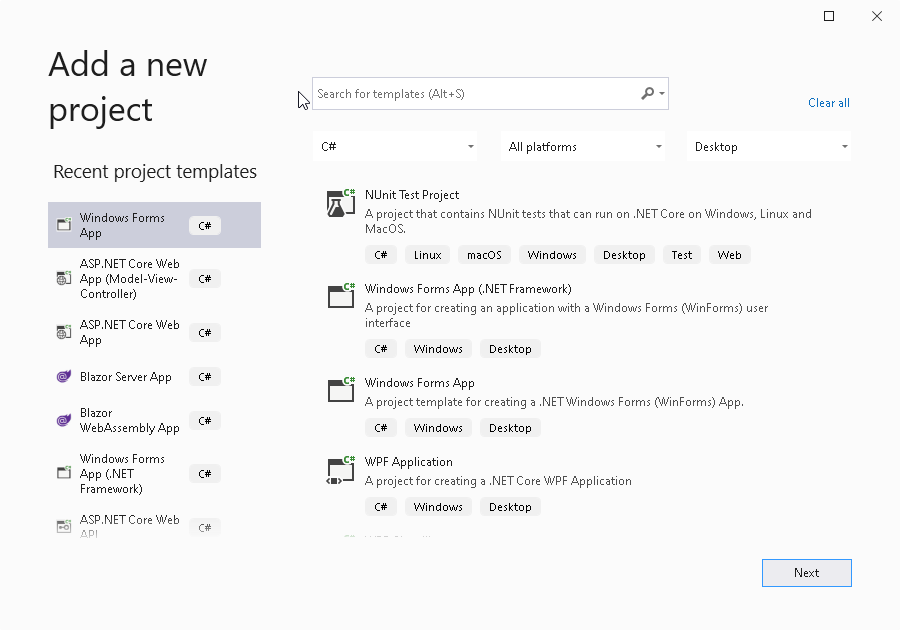
For the quick result, let's go with a winform application in visual studio
Create the basic winforms application
Add nuget package
Add the nuget package AWSSDK.Translate to your application, with this package, you can easily use the AWS Translate API.

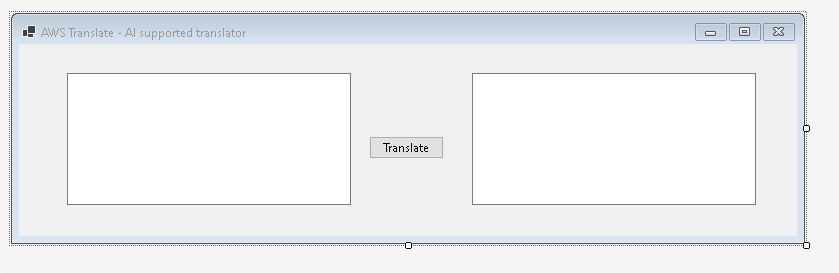
Let's create a basic winform layout, with two textbox - one for the input, and the other will show the translated text - and a button.
Create AWS IAM User
Before we create the translation c# code, let's create an AWS user for the API call, we will use the IAM service:
IAM, or Identity and Access Management, is a service that allows you to manage your AWS access credentials. IAM is a collection of services that provide identity and access control for AWS. AWS Identity and Access Management (IAM) helps you manage the identities of your AWS customers, your own credentials, and the permissions that each customer or credential has for accessing various AWS resources.
We can create an IAM user with permission to only access some specific resources in the account. In this case we want to create a user with permission to the AWS Translate service.
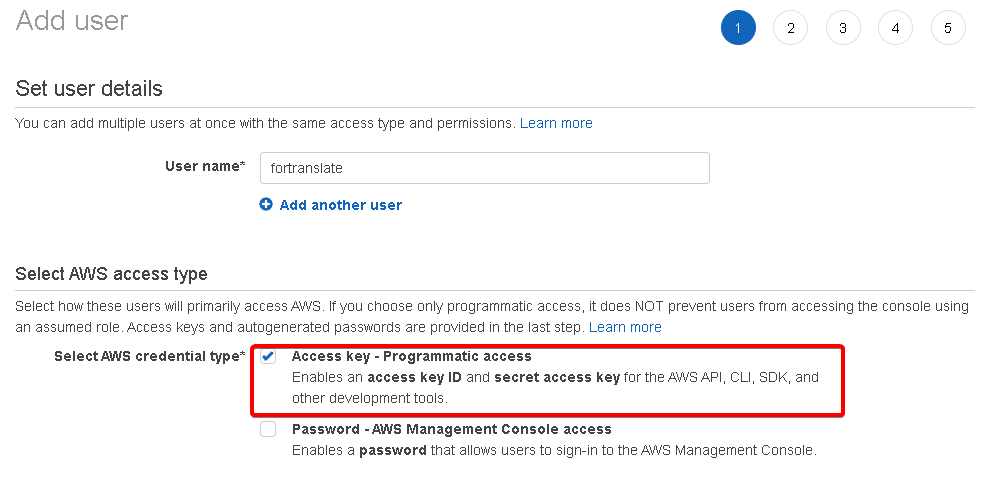
Let's goto the IAM console, and add a user, it's importotant to set the programmatic acess checkmark, this is the setting we need only, as we want to use this user for API calls.
Search for the AWS Translate permission (readonly is enough), and attach it to the user

Just move forward on the rest of the pages (tags,etc), and create the user, at the finish screen, you will see the AWS Key, and the secret, download it, or copy paste it to a notepad for temporary storage. you need this at the next step in the code.

Let's back to the visual studio for coding :-)
The button code, will be very simple, thanks to the great AWS SDK, just two lines, create a client, and call the translate method. at this step we need to use the aws key and secret what we created in the previous step.

private void button1_Click(object sender, EventArgs e)
{
    Amazon.Translate.AmazonTranslateClient cl = new Amazon.Translate.AmazonTranslateClient(awskey, awssecret);
    var request = new Amazon.Translate.Model.TranslateTextRequest() { Text = textBox1.Text, SourceLanguageCode = "hu", TargetLanguageCode = "en" };
    var result = cl.TranslateTextAsync(request).Result;

    textBox2.Text = result.TranslatedText;
}
at the language code, you can use any two letter language code which is supported by the aws translate
If you run our simple application, just enter the text on the left side, press the translate and voila, the perfect AI assisted translation is on the right side.
Congratulation!
Conclusion
The AWS Translate SDK is very easy to use (like all the other aws sdks), so can spend you valueable time on your work/ideas not on the "how to the hell is this sdk is working" scenario.